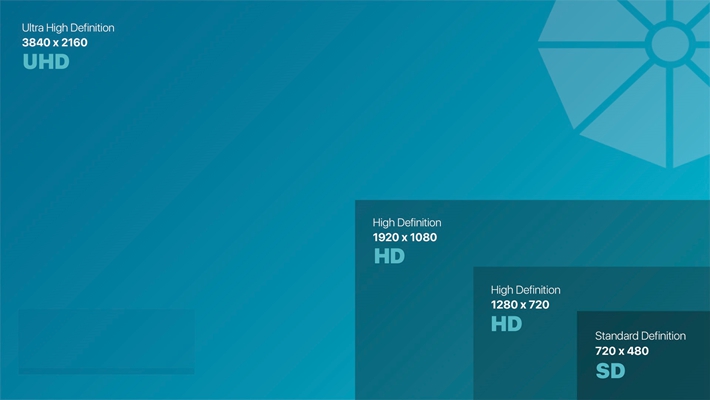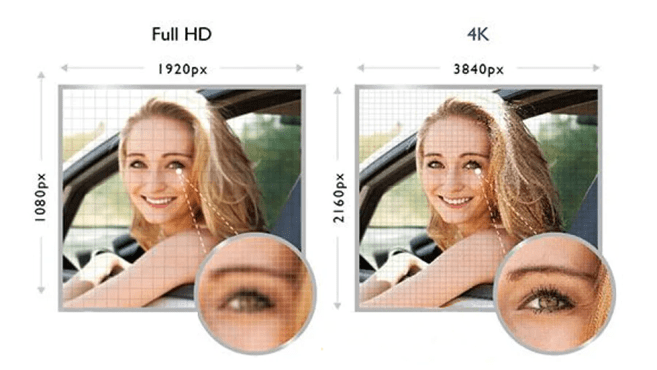
1080P refers to 1920×1080 pixels of resolution and has other names like Full HD and FHD. It offers a better viewing experience especially on large displays, best-suited for streaming, and has a higher quality compared to HD resolution. 720P is a 1280×720 px resolution commonly referred to as HD ready or standard HD and is used in a progressive HD signal format. Where the 720P fails to live up to viewing expectations, the need to upscale the resolution becomes necessary. And to achieve this, reliable video converter software is very highly recommended.
This article seeks to provide you with a couple of methods and tools to help you upscale/convert 720P to 1080P. The good thing is that we have also selected the best programs to realize a reliable process. Without further ado, let’s learn how to convert 720P videos to 1080P flawlessly.
How to convert 720P videos to 1080P
The features programs include;
1. TalkHelper Video Converter (Recommended)
TalkHelper Video Converter has endeavored in the video conversion industry and once again proves to be the top 720P to 1080P converter in terms of reliability. It uses very highly refined algorithms that result in a lossless video conversion process resulting in a very top-tier resolution upscale. For multiple files, calling the batch convert features goes a long way to save you a ton of time and effort.
Better yet, hardware acceleration is available, coupled with multi-core processing to deliver high-quality 720P to 1080P upscaling. Some of the output formats at your disposal include FLV, AMV, DVD, AVI, MP4, MOV, MPEG, ASF, RMVB, WMV, SWF, 3GP, M4V, RM, just to mention a few. Not forgetting the adjustable presets that help reduce the number of settings to tinker with.
![]()
Steps to convert 720p video to 1080p using TalkHelper Video Converter:
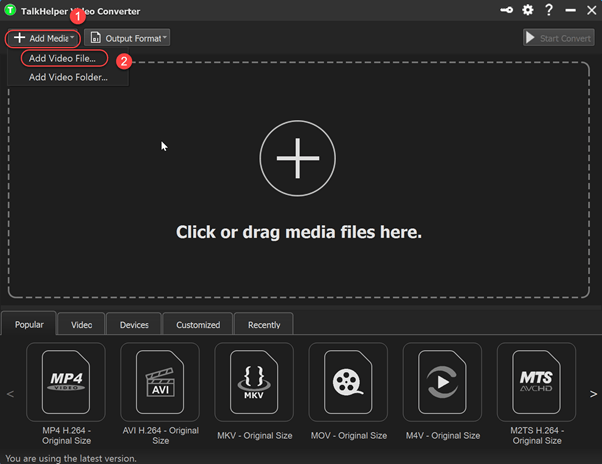
Step 1: Launch TalkHelper Video Converter and from the “Add Media” menu, pick the “Add Video File…” to import single 720p files or the “Add Video Folder…” option to add a folder containing files to upscale.
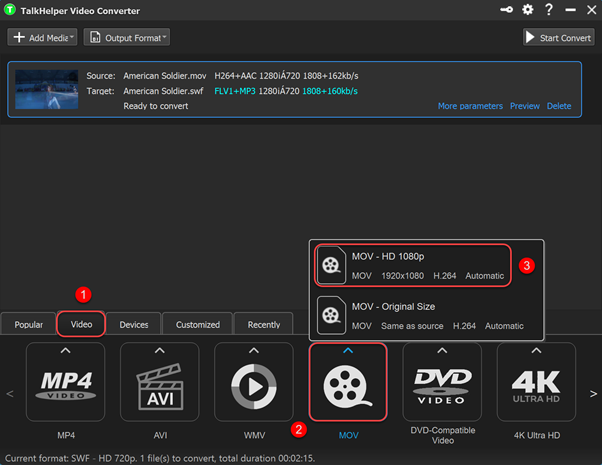
Step 2: Head over to the “Video” tab at the bottom section of the interface, scroll the list of output formats and pick the one that you prefer. Expand the sub-formats and select the one that has “1080p” or 1920 by 1080 dimensions in the description.
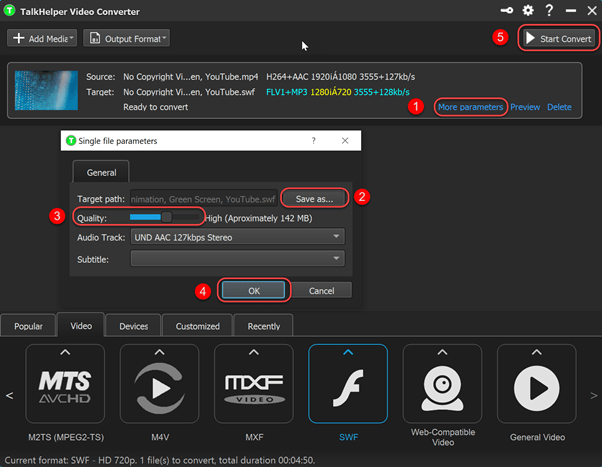
Step 3: Access output options by clicking on the “More parameters” button. From the new mini-window, use the “Save as…” button to set your preferred filename and preferred output directory, use the “Quality:” slider to your preferences, and then hit the “OK” button to effect the changes. Now, you just need to hit the “Start Convert” button to start the 720P to 1080P conversion.
2. Adobe Premiere Pro
Adobe Premiere Pro is a professional video maker and editor software that fits in all fields of implementation. It offers to provide you with automated video reformatting when you upscale so that the content remains in the frame. Using the built-in timeline, editing, and tweaking a video for upscale is so convenient. Better yet, there are no restrictions regarding the file format/quality you can add.
This means that 240P, 360P, 480P, and 720P can be upscaled into 1080P or even 4K UHD in a satisfactory process flawlessly. To make the process even more convenient, you can use the profile presets and get rid of the need to adjust lots of settings. Overall, the upscaled video file will be of premium quality that not many video resolution converter software can rival.
![]()
Steps to convert 720p video to 1080p using Premiere Pro:
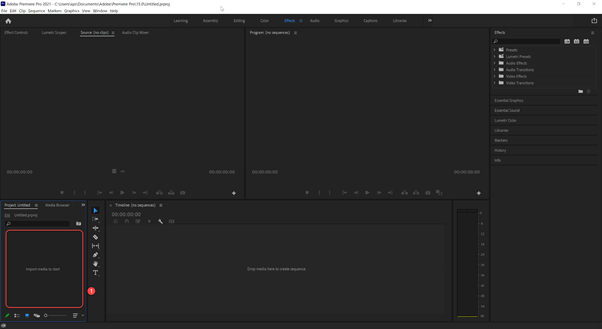
Step 1: Run Premiere Pro, create a new project, and then double-click on the “Import media to start” panel to import an HD video file to upscale to Full HD.
Step 2: Add the imported video file to the timeline. Simply drag and drop the video file in the “Drop media here to create sequence” panel.
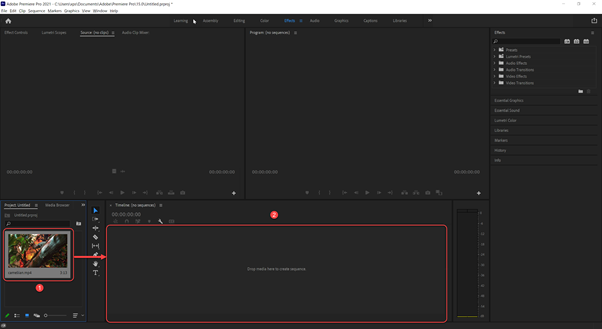
Once you have the video in the timeline, you should be looking at an interface similar to the one below. Notice the video already added to the timeline.
Step 3: Time to edit the settings necessary for an upscale. To do that, head over to the “Sequence” menu and click on the “Sequence Settings…” option.
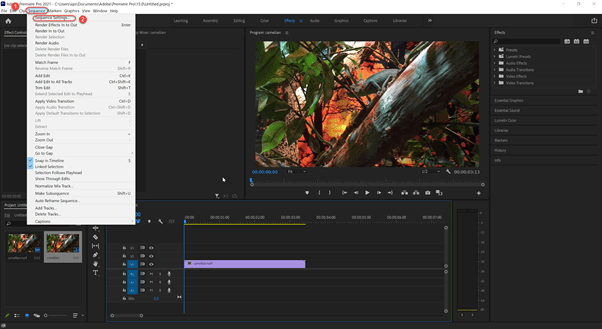
On the resulting “Sequence Settings” window, go to the “Video” section, and adjust the “Frame Size:” values. Input “1920” and “1080” as the horizontal and vertical sizes respectively. Ensure to tick the “Maximum Bit Depth” and “Maximum Render Quality” options for the best output quality too. Click on the “OK” button to save changes.

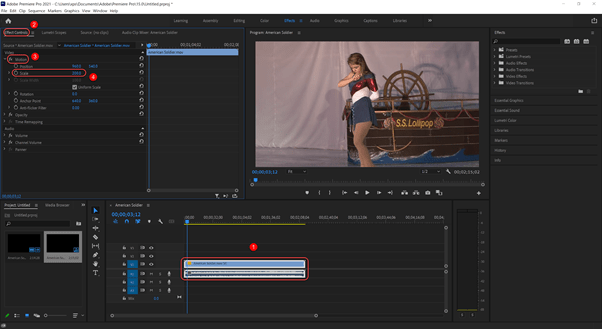
Step 4: Adjust the video scaling. To ensure that the video fits on the screen as required, click on the video on the timeline to activate the “Effect Controls”, and under the “Video” section, expand the “fx Motion” option. Next, adjust the “Scale” value to “200” and notice that the video fills up the preview window perfectly.
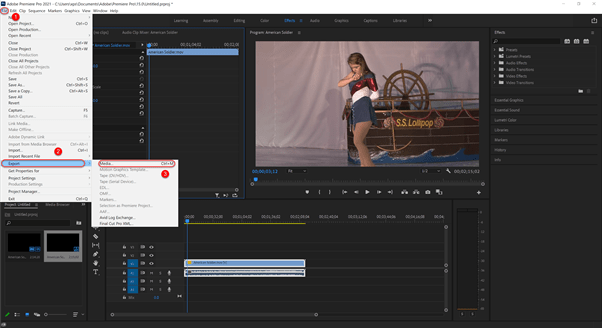
Step 5: Time to export the upscaled video file. Head over to the “File” menu, access the “Export” side-kick menu and click on the “Media…” option to open the interface below.
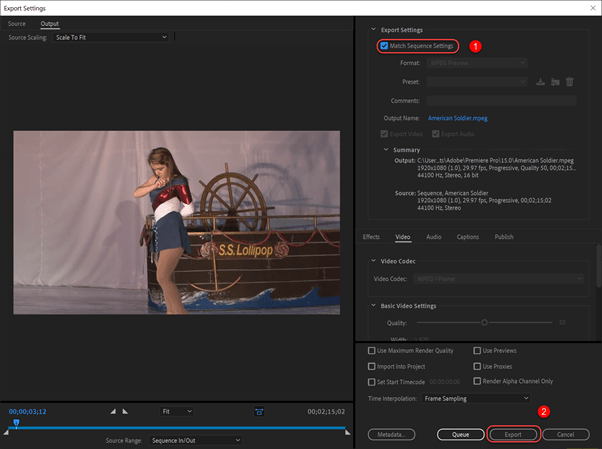
In the resulting pop-up window, make sure to tick the “Match Sequence Settings” option under “Export Settings” and then hit the “Export” button to start the upscale of 720P to 1080P.
3. Wondershare UniConverter
Wondershare UniConverter is a trustworthy, all-in-one software that makes the process to upscale 240P/360P/480P/720 to 1080P feel just like a walk in the park. It is the perfect app to upscale video resolution no matter the video format including AVI, MOV, MP4, MKV, DVD, Blu-ray, among others. Using the included GPU acceleration, upscaling tasks take way less time and the original video quality is retained to the greatest extent.
In fact, this video resolution converter offers speeds up to 30X faster than normal. When the need arises, multiple 720P files can be upscaled into 1080P files all at the same time, thanks to the batch convert feature. You are also presented with a video editor to help trim, crop, add subtitles, watermark, add effects, and adjust audio to your preferences. Better yet, even when upscaling, you have the chance to compress the output video while maintaining the right size and quality of the file.
![]()
Steps to upscale HD video to 1080P using Uniconverter:
Step 1: Open Wondershare UniConverter, select the “Converting” mode, pick “Video Converter” from the left side panel, expand the file import icon and choose the source(“Add Files”, “Add Folder”, “Add from Device”, or “Add from Camcorder” of the 720P HD video you need to upscale to 1080P Full HD video.

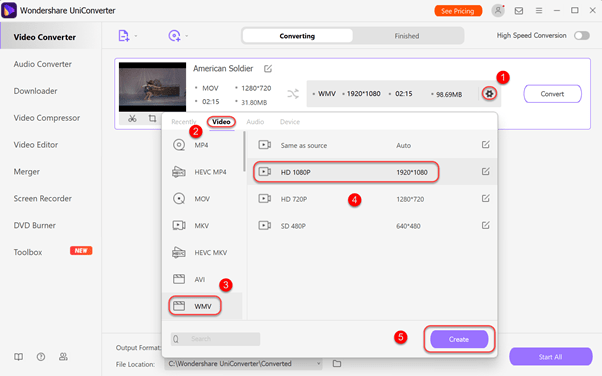
Step 2: Select your preferred output format and match it with the 1080P resolution. To do this, click on the cog-like icon to open a comprehensive list of output formats and devices. On the pop-up window, select the “Video” tab, your preferred output format from the left panel, choose 1080P from the right panel, and then hit the “Create” button.
Step 3: Under the “File Location:” section, pick the saving directory of choice and then click on the “Convert” button to complete the video resolution upscaling process.

![]()
Conclusion
720P to 1080P scaling is an important task and having the best 7HD to Full HD upscaler is important to ensure the best output quality. Luckily, we have presented you with several methods on how to go about the process. Time to say goodbye to low-resolution videos with the comprehensive how-to guides outlined in this article.